Elegant & Acoustic

Slatted Wood Panels

Add warmth, texture and luxury to your walls with Oak, Walnut or Black Ash.

Elegant & Acoustic

Slatted Wood Panel

Add warmth, texture and luxury to your walls with Oak, Walnut or Black Ash.

These premium quality acoustic wooden panel are designed to support aesthetic interiors while acting as a functional acoustic solution.

Noise is a common day-to-day distraction but one that can be remedied easily with high quality acoustic solutions. Our acoustic wooden panels feature a felt backing that helps to absorb sounds within the space to create a quieter and better acoustic environment.

These Acoustic Wooden Panels have been designed with aesthetics and modern interiors in mind. The decorative nature of the acoustic timber panels makes this product ideal if you’re looking to create a stylish, modern feature wall whilst reaping the benefits of improved acoustics.

The acoustic properties, make these panels the perfect choice for TV rooms/media rooms, game rooms, offices or where you want to improve the sound

5 products

About

About the Acoustic Wood Range

These premium quality acoustic wooden panel are designed to support aesthetic interiors while acting as a functional acoustic solution. The sound absorbing felt backing helps reduce background noise whilst the slatted panel design offers unmatched aesthetic benefits to a range of interiors.

  • Improves interior acoustics
  • Simple and easy to install
  • Premium quality materials
  • Free delivery
What are the products made from?

The panels are made from 100% natural and sustainable materials. The acoustic wooden panels are of high-quality and contain no harmful chemicals or materials.

The base of the product features a 9mm thick grey polyester material partly made from recycled bottles.

Installation Information, Painting & Finishing

The slatted wooden panels can be installed with screws or applied with adhesive to offer a fast and simple installation process.

Insulation can be used to improve the acoustic performance of your acoustic timber panel.

Who will install the wall panelling?

We supply a great range of wall panels which are lightweight and easy to install onto your walls. Your order will be delivered to your door and you can either install the panelling yourself if you are a handy person, or you could hire a carpenter or fitter to install the panels for you.

We have installation guides to help too, if you need one.  Please contact us for more information on this.

If you have any further questions

Contact the Library Ladder Company

Should you have any questions about our wall panelling products, please get in touch with the Library Ladder Company team by sending an e-mail to info@thelibraryladdercompany.co.uk. Our friendly staff will respond to your enquiries with more information as soon as possible, and are always happy to offer expert wall panelling advice.

In the meantime, you can peruse our Frequently Asked Questions below to find out more about wall panels and how to install them. If you need creative wall panelling ideas, keep scrolling to browse our gallery of stunning painted wall panels for some interior design inspiration! You can also click through to each product page for more photos.

Please note that these products are suitable for use on walls only, and should not be installed on ceilings or floors (excluding specifically stated ceiling panels, such as No. 30, which can be installed on ceilings in addition to walls). If you’re looking for decorative ceiling mouldings, please view our coving collection.

Wall Panelling FAQs

Is wall panelling still on-trend?

Absolutely! Though decorative wall panelling dates back for many centuries, interior wall panels remain a popular interior design trend even in modern times. Property owners continue to invest in wall panelling for the unique character it brings to their homes.

Painting or wallpapering plastered walls is still a common aesthetic fix, but it doesn’t come close to the quality and durability that the decorative touch of wall panelling can add to a room. As panel production evolves, more affordable yet reassuringly strong materials are available, with wall panels becoming ever easier to install wherever you want them.

Wall panelling isn’t just something you see in historic stately homes – though you can use it to emulate such styles if you wish. The variety of wall panel textures are the perfect primed canvas for any paint colour, allowing you to create versatile modern looks with relatively little effort. The possibilities are endless with interior wall panelling.

Where can you use wall panelling?

One of the great things about wall panels is that you can install them pretty much anywhere to totally transform the space. You can use the panels to disguise unsightly utility boxes, or to enhance existing structural features like windows, fireplaces, inset walls, or built-in storage such as shelving. The panels can also be used to refresh cupboard doors, cover drawer fronts and upcycle old furniture.

The only limits are the layout of your home and your imagination, so why not put your creativity to the test and figure out where the beautiful wall panelling will serve your interiors best? Whether you use panelling behind a bed or sofa to distinguish separate spaces, or to dress up a dining room or other social area, we guarantee that our wall panels will look wonderful wherever you install them.

Will wall panelling make my room look smaller?

As wall panelling ventures out from your base wall, many people worry that this will make the room look much smaller than it actually is. However, this is usually not the case – the layout of the room and the amount of natural light often contribute more to the visual sense of space than wall cladding.

If you still have concerns about the confines of your room with wall panels, the solution is to select your panelling height and paint colours carefully and space them evenly. Panelling halfway up walls can make ceilings feel lower, so it’s better to go up to a third or two-thirds high instead. For example, a dado rail about 1 metre from the ground is a great choice.

Lighter colours are also best if you’re worried about the spatial consequences of panelling a small room, especially for floor-to-ceiling panels. Even if you paint everything in the same colour, the structure of the panelling will create areas of light and shade, which provides more depth and creates the illusion of more space.

How much wall panelling do I need?

When carrying out a wall panelling project, we understand that you don’t want to end up ordering too much or too little.

At the Library Ladder Company, we provide premade wall panels in set sizes, with each dimension listed on the dedicated product page in centimetres. This includes the projection measurement, which tells you how far the panel will protrude from the wall.

You can compare these measurements to the dimensions of the room you plan to install the panelling in. Use this information to calculate not only how many panels you’ll need to cover the desired area, but also how much of your budget this will cost, and you’ll have a better idea of the scope of your project before you purchase.

How do I measure for wall panelling?

It’s essential to ensure that your measurements are as accurate as possible before you buy, as we wouldn’t want you to order the wrong size or number of panels. You’ll need at least two people and a reliable tape measure that’s long enough to assess the height and length of each individual wall you want to put panels on.

Take notes of the measurements as you go, measuring from floor to ceiling and left side to right side on each section of wall. This includes any protruding or inset sections that you intend to install panelling over. Also measure any windows, doorways and radiators - so you can subtract these from your panelling requirements. 

Next, think about where you want the panels to be, and measure from the ground up to the desired height. Multiply that height by the length of the wall, and that’s how much panelling you’ll need for that section.

Repeat this for each individual wall and add up every figure to get the total amount of panelling you’ll need. Round up, allowing for around 5%-10% of wastage, to prevent ordering panels that are too short or not ordering enough. When measuring up, you’ll need to take plumbing, electrics, and any skirting boards into account. If anything needs to be re-sited, you must hire a professional to do this properly to prepare for installation.

Please contact us if you need further assistants to work out how much panelling you will need.

How high should wall panelling be?

In addition to the profile of the wall panelling itself, the height of the wall panels also has a huge impact on the overall visual effect. Whether you panel a section of the wall or go up to the ceiling, around the room or just one wall, keeping this feature in proportion to the rest of the room is key.

Though there are no strict design rules for wall panelling, most people prefer to stick to the ‘rule of thirds’ – which simply means capping the panel one third of the way up the wall, and leaving the upper two thirds unpanelled. For example, a three-metre wall would require one-metre panelling.

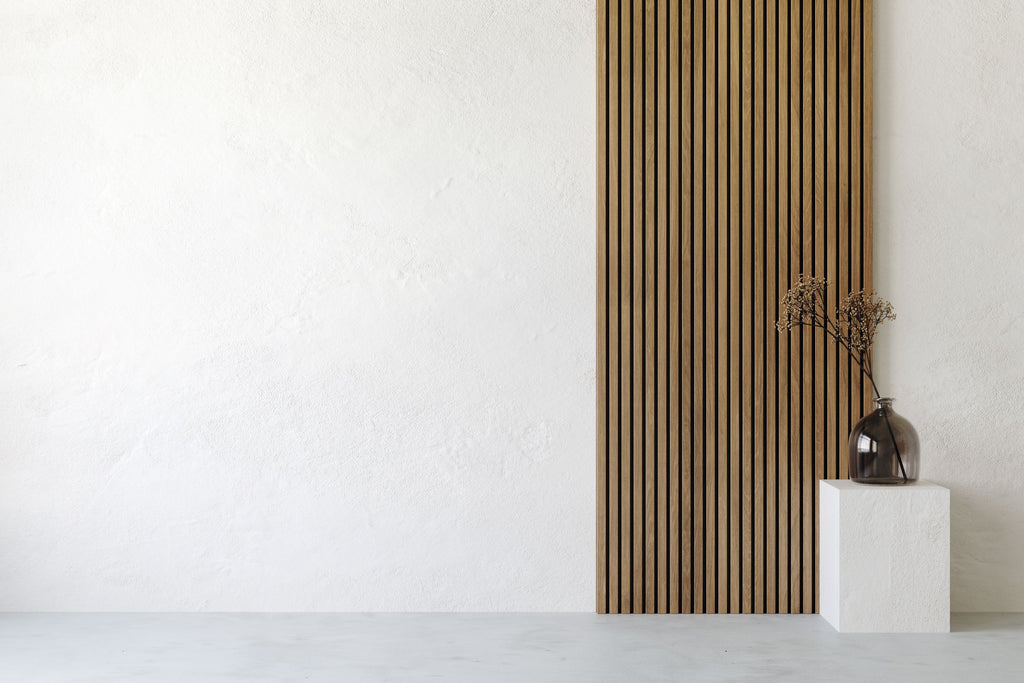
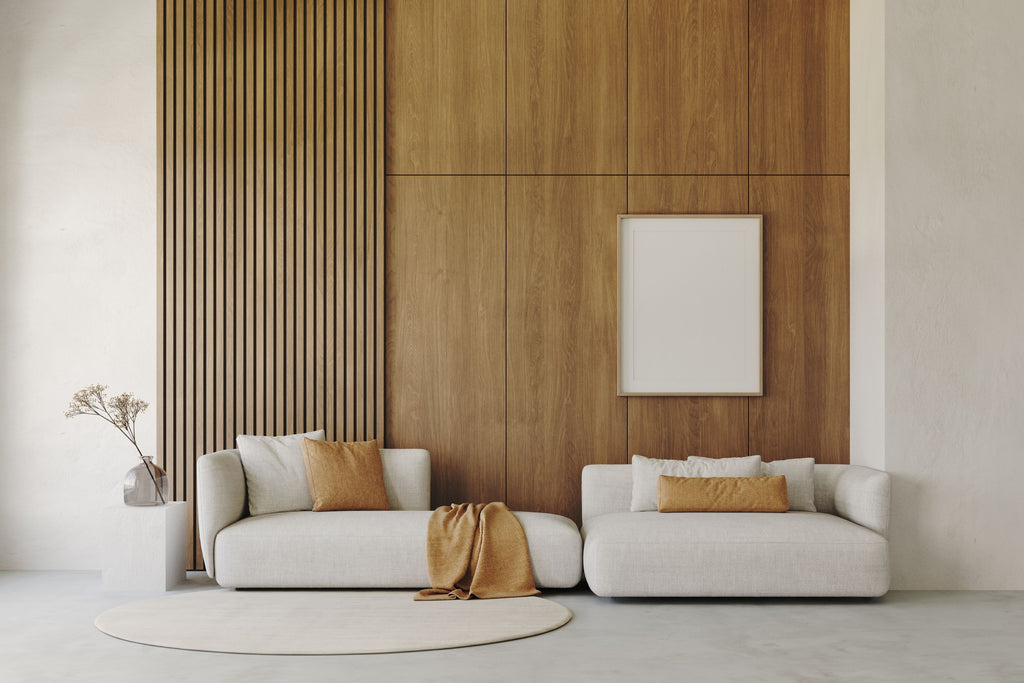
Of course, the most suitable height depends on the particular room you’re panelling and its specific features. Things like windows, fixed cabinets, and plumbing can affect the symmetry if the heights aren’t compatible. Floor-to-ceiling wall panelling only tends to look good in larger rooms with more light, or on one ‘accent wall’ only, while eye-level wall panels are a safe fallback for most rooms.   

Another safe option is ‘dado rail’ height, which is usually around one metre tall (regardless of the ceiling height). The original purpose of dado rails was to protect the walls of dining rooms and sitting rooms when people pushed back their chairs to stand up, so you can also achieve this effect by pushing your own chairs against the wall (gently!) and measuring a few inches above their backs. 

If you’re looking for something different, panelling two-thirds of the way up the wall can give the room a stately appearance. Alternatively, you could ‘extend’ the skirting board by installing low-height wall panels as a baseboard for enhanced kick protection, and match them to door frames. 

Can you fit wall panelling up a staircase?

Yes, you can use the decorative wall panelling for staircases, too. As busy thoroughfares in most buildings, areas such as hallways, stairs, and landings need durable walls that also offer some visual interest as people pass through. Installing wall panels is a convenient way to achieve both at once.

The thick and sturdy wall panelling will resist knocks and bumps in high traffic areas of your home, while the patterns and 3D textures will capture everyone’s attention. Your choice of paint colour also affects the impression your home or business gives, whether that’s a clean, refined white or neautral shade or perhaps a darker tone. Even painting your wall a different colour to your panelling to add further interest.

Visit our dedicated page by clicking here to find out more about the wall panelling for stairs and entryways. We provide a selection of stunning wall mouldings that you can combine with the wall panels to create a dado rail effect along your stairs and landings, connecting your décor throughout.

Can I install wall panels over wallpaper or tiles?

One of the many advantages of the practical wall panelling is that it can be used to cover walls in a range of conditions, without needing to be an expert in preparation . Of course, it’s preferable for the wall to be in good condition for the best application, but you can install the polyurethane wall panels to most surfaces, as long as you can place them evenly and use an appropriate adhesive.

The best type of wall is a smooth and even base without cracks or bumps, which can be achieved by sanding the surface and patching any holes or gaps with a suitable filler material. If the surface is uneven, it will be difficult to position the panels properly and achieve a consistent, attractive finish.

While you can use wall panelling to cover up plastered, wallpapered, or tiled walls, you should still do some priming to ensure the best possible finish for your panelled wall. This means cutting away peeling wallpaper and filling in tile grouting if necessary, and cleaning up leftover dust and debris.

You also need to make sure that you use the right glue for the surface material you’re applying the wall panels to. For example, sticking panels over tiles usually requires a polymer-based adhesive, while water-based acrylic adhesive should be strong enough for standard plaster or drywall. You can find a range of wall panel adhesives on our website, including acrylic deco filler for sealing any gaps.

How do I deal with power points and switches when fitting my panelling?

We would advise you to consult an electrician if you
intend to relocate your socket or if you are not comfortable with removing and replacing the front plates of sockets or switches. In order to fit your panel, you will need to remove the front plate of the switch or socket.

Offer your wall panel up to your wall in the location of where you are installing the panels and review the location of the socket. You may want to tweak the overall location of the panels once you see where the sockets sit in relation to panel edges. Once you are happy with the location, mark up the location points of the socket onto the panel.

Take the marked-up panel to your cutting area along with the front plate of the plug socket or switch and mark all around the size of the socket or switch plate onto the front of your wall panel.

Using a fresh bladed saw make a plunge cut into the centre of the panel and cut the shape of your socket or switch out of the material. You are nearly ready to install.

Apply adhesive all around the rear perimeter of your panel and along the centre line and you should apply a modest amount of adhesive along the inside edges of the hole you have created. Mount your panel to the wall in the marked-up location, apply pressure. Reconnect your wiring (or have your electrician do it) and slide the plate back into the hole and fix.